Histogram-based classification
06 Apr 2011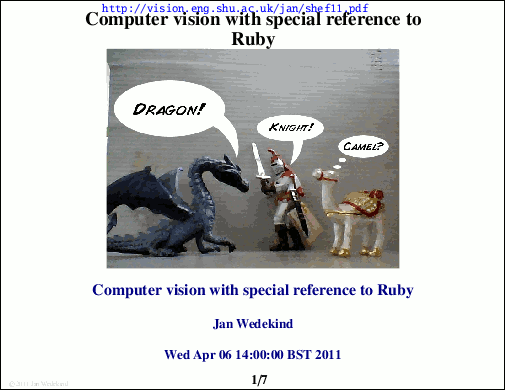
Here is a small presentation showing histogram-based classification with Ruby.
Here is the program to capture the reference pictures
#!/usr/bin/env ruby
require 'rubygems'
require 'hornetseye_v4l2'
require 'hornetseye_rmagick'
require 'hornetseye_xorg'
include Hornetseye
BOX = [220 ... 420, 140 ... 340]
input = V4L2Input.new
mask = MultiArray.bool(640, 480).fill!
mask[*BOX] = true
labels = ['reference', 'dragon', 'knight', 'camel']
labels.each do |label|
  X11Display.show(:title => label.capitalize) do
    img = input.read_ubytergb
    mask.conditional img, img >> 1
  end[*BOX].save_ubytergb "#{label}.jpg"
end
The program for live classification is shown below
#!/usr/bin/env ruby
require 'rubygems'
require 'hornetseye_v4l2'
require 'hornetseye_rmagick'
require 'hornetseye_xorg'
include Hornetseye
PI = Math::PI
RAD = 2.0 * PI
VAL = 117.0
HBINS = 8
CBINS = 8
THRESHOLD = 32
N = 5
BOX = [220 ... 420, 140 ... 340]
class Node
  def hsv_hist(hbins = HBINS, cbins = CBINS)
    alpha = 2 * r.to_sint - g - b
    beta = Math.sqrt(3) / 2 * ( g.to_sint - b )
    h = ( (Math.atan2(beta, alpha) + PI) * (HBINS / RAD) ).to_int.clip 0 .. HBINS - 1
    c = ( Math.sqrt(alpha ** 2 + beta ** 2) * (CBINS / VAL) ).to_int.clip 0 .. CBINS - 1
    [h, c].histogram(hbins, cbins).to_int
  end
  def cmp(other)
    (self - other).abs / (self + other).major(1.0)
  end
end
input = V4L2Input.new
mask = MultiArray.bool(640, 480).fill!
mask[*BOX] = true
labels = ['reference', 'dragon', 'knight', 'camel']
hists = labels.collect do |object|
  MultiArray.load_ubytergb("#{object}.jpg").hsv_hist
end
history = ['reference'] * N
X11Display.show do
  img = input.read_ubytergb
  img_hist = img[*BOX].hsv_hist
  similarities = hists.collect { |hist| img_hist.cmp(hist).abs.sum }
  label = labels[similarities.index(similarities.min)]
  history = [label] + history[0 ... N - 1]
  if history == [label] * N
    system "echo '#{label}' | festival --tts" if label != 'reference'
  end
  history != ['reference'] * N ? mask.conditional(img, img >> 1) : img
end
And here is a demonstration video of the two programs
Bitcoin peer-to-peer currency
27 Feb 2011I watched this interview with Steve Gibson about the Bitcoin crypto currency. The Bitcoin software for online peer-to-peer banking was developed by Satoshi Nakamoto (中本 哲史) and it is available at bitcoin.org.
 Basically every block of Bitcoins is a solution of a cryptographic equation. I.e. instead of a scarce metal (such as gold), the currency uses hard computational problems as a proof of work. Standard asymmetric encryption is used to digitally sign transactions. The proof of work is also used to cryptographically strengthen a chain of transactions in order to prevent double-spending of coins (see Bitcoin publication for more details). The only known attack requires the attacker to have more computational power at his/her disposal than the entire network of Bitcoin clients.

There’s a number of organisations and shops which already accept Bitcoins (see Bitcoin.it for a list of sites that accept Bitcoins). Furthermore there are several traders which will exchange Bitcoins for US dollars, Euros, and other currencies (there is an early review of Bitcoin exchanges). According to Bitcoin Charts the exchange rate currently is around 0.9 USD/BTC
Update:
There are concerns that Bitcoin will suffer a deflationary spiral because the total amount of currency is limited. Of course if this is a real problem one could start a new peer-to-peer currency with a built-in controlled inflation.
Update:
Here’s a nice video giving a quick introduction to Bitcoin.
See Also:
Playing Squash with the Wii Remote
14 Feb 2011
I gave a presentation about developing a Squash game using the Nintendo Wii Remote at the Sheffield Ruby User Group (ShRUG).
Here is the source code of the main program
#!/usr/bin/env ruby
require 'rubygems'
require 'hornetseye_rmagick'
require 'hornetseye_alsa'
require 'opengl'
require 'cwiid'
include Hornetseye
WIDTH = 800
HEIGHT = 600
GRAVITY = 9.81
SPEED_PER_VOLUME = 16.0
SIZE_X = 3.2
SIZE_Z = 9.75
BAR_HEIGHT = 0.43
BAR_THICKNESS = 0.1
RADIUS = 0.02025 * 2
REFLECTION = 0.7
AIR_FRICTION = 0.00
ROLL_FRICTION = 0.1
MIN_SPEED = 0.8
ACC_RISING = 20.0
ACC_FALLING = 0.0
MIN_DELAY = 0.3
MIN_HEIGHT = 0.15
OBSERVER_Y = -2.4
OBSERVER_Z = -10.5
DIST_Z = 6.0
X0 = -2.0
H0 = 1.5
SERVE_SPEED = 5.0
V_MIN = 8.0
V_MAX = 20.0
Z0 = DIST_Z - SIZE_Z
NORM_Z = -1.5
L = 1.0
# switch on lights with WiiMote
# http://www.paulsprojects.net/opengl/shadowmap/shadowmap.html
# http://bitwiseor.com/gl_arb_shadow/3/
puts 'Put Wiimote in discoverable mode now (press 1+2)...'
wiimote = nil
wiimote = WiiMote.new
wiimote.rpt_mode = WiiMote::RPT_BTN | WiiMote::RPT_ACC if wiimote
$floor = MultiArray.load_ubytergb 'floor.png'
$side = MultiArray.load_ubytergb 'side.png'
$back = MultiArray.load_ubytergb 'back.png'
( MultiArray( SINT, 2, 16 ).new * 0.5 ).to_sint
s = File.new( 'wall.wav', 'rb' ).read; s = s[ 44 .. -1 ]
m = Malloc.new s.size; m.write s
$wall = MultiArray( SINT, 2, m.size / 4 ).new m
s = File.new( 'ground.wav', 'rb' ).read; s = s[ 44 .. -1 ]
m = Malloc.new s.size; m.write s
$ground = MultiArray( SINT, 2, m.size / 4 ).new m
s = File.new( 'racket.wav', 'rb' ).read; s = s[ 44 .. -1 ]
m = Malloc.new s.size; m.write s
$racket = MultiArray( SINT, 2, m.size / 4 ).new m
$pos = [ X0, RADIUS, Z0 ]
$v = [ 0.0, 0.0, 0.0 ]
$t = Time.new.to_f
$sign = nil
$strength = 0.0
$delay = Time.new.to_f
$alsa = AlsaOutput.new 'default:0'
$sounds = []
def init
  GL.ClearColor 0.0, 0.0, 0.0, 1.0
  GL.Lightfv GL::LIGHT0, GL::AMBIENT, [ 1.0, 1.0, 1.0, 1.0 ]
  GL.Lightfv GL::LIGHT0, GL::DIFFUSE, [ 1.0, 1.0, 1.0, 1.0 ]
  GL.Lightfv GL::LIGHT0, GL::POSITION, [ 0.0, 6.5 + OBSERVER_Y, -3.0 + OBSERVER_Z, 1.0 ]
  GL.Lightfv GL::LIGHT0, GL::SPOT_DIRECTION, [ 0.0, -1.0, -0.5 ]
  GL.Lightf GL::LIGHT0, GL::SPOT_CUTOFF, 60.0
  GL.Lightf GL::LIGHT0, GL::SPOT_EXPONENT, 1.2
  GL.Enable GL::LIGHT0
  GL.Enable GL::LIGHTING
  GL.DepthFunc GL::LESS
  GL.Enable GL::DEPTH_TEST
  $tex = GL.GenTextures 3
  GL.BindTexture GL::TEXTURE_2D, $tex[0]
  GL.TexParameter GL::TEXTURE_2D, GL::TEXTURE_MIN_FILTER, GL::NEAREST
  GL.TexImage2D GL::TEXTURE_2D, 0, GL::RGB, 256, 256, 0,
                GL::RGB, GL::UNSIGNED_BYTE, $floor.memory.export
  GL.BindTexture GL::TEXTURE_2D, $tex[1]
  GL.TexParameter GL::TEXTURE_2D, GL::TEXTURE_MIN_FILTER, GL::NEAREST
  GL.TexImage2D GL::TEXTURE_2D, 0, GL::RGB, 256, 256, 0,
                GL::RGB, GL::UNSIGNED_BYTE, $side.memory.export
  GL.BindTexture GL::TEXTURE_2D, $tex[2]
  GL.TexParameter GL::TEXTURE_2D, GL::TEXTURE_MIN_FILTER, GL::NEAREST
  GL.TexImage2D GL::TEXTURE_2D, 0, GL::RGB, 256, 256, 0,
                GL::RGB, GL::UNSIGNED_BYTE, $back.memory.export
  $list = GL.GenLists 2
  GL.NewList $list, GL::COMPILE
  GL.Enable GL::TEXTURE_2D
  GL.Material GL::FRONT, GL::AMBIENT, [ 0.2, 0.2, 0.2, 1.0 ]
  GL.Material GL::FRONT, GL::DIFFUSE, [ 0.8, 0.8, 0.8, 1.0 ]
  GL.BindTexture GL::TEXTURE_2D, $tex[0]
  GL.Begin GL::QUADS
  GL.Normal 0.0, 1.0, 0.0
  GL.TexCoord 0.0, 1.0; GL.Vertex -SIZE_X, 0.0, 0.0
  GL.TexCoord 1.0, 1.0; GL.Vertex  SIZE_X, 0.0, 0.0
  GL.TexCoord 1.0, 0.0; GL.Vertex  SIZE_X, 0.0, -SIZE_Z
  GL.TexCoord 0.0, 0.0; GL.Vertex -SIZE_X, 0.0, -SIZE_Z
  GL.End
  GL.BindTexture GL::TEXTURE_2D, $tex[2]
  GL.Begin GL::QUADS
  GL.Normal 0.0, 0.0, 1.0
  GL.TexCoord 0.0, 0.914; GL.Vertex -SIZE_X, BAR_HEIGHT, -SIZE_Z
  GL.TexCoord 1.0, 0.914; GL.Vertex  SIZE_X, BAR_HEIGHT, -SIZE_Z
  GL.TexCoord 1.0, 0.0; GL.Vertex  SIZE_X, 5.0, -SIZE_Z
  GL.TexCoord 0.0, 0.0; GL.Vertex -SIZE_X, 5.0, -SIZE_Z
  GL.Normal 0.0, 1.0, 0.0
  GL.TexCoord 0.0, 0.914; GL.Vertex -SIZE_X, BAR_HEIGHT, -SIZE_Z
  GL.TexCoord 1.0, 0.914; GL.Vertex  SIZE_X, BAR_HEIGHT, -SIZE_Z
  GL.TexCoord 1.0, 0.914; GL.Vertex  SIZE_X, BAR_HEIGHT, BAR_THICKNESS - SIZE_Z
  GL.TexCoord 0.0, 0.914; GL.Vertex -SIZE_X, BAR_HEIGHT, BAR_THICKNESS - SIZE_Z
  GL.Normal 0.0, 0.0, 1.0
  GL.TexCoord 0.0, 0.914; GL.Vertex -SIZE_X, BAR_HEIGHT, BAR_THICKNESS - SIZE_Z
  GL.TexCoord 1.0, 0.914; GL.Vertex  SIZE_X, BAR_HEIGHT, BAR_THICKNESS - SIZE_Z
  GL.TexCoord 1.0, 1.0; GL.Vertex  SIZE_X, 0.0, BAR_THICKNESS - SIZE_Z
  GL.TexCoord 0.0, 1.0; GL.Vertex -SIZE_X, 0.0, BAR_THICKNESS - SIZE_Z
  GL.End
  GL.BindTexture GL::TEXTURE_2D, $tex[1]
  GL.Begin GL::QUADS
  GL.Normal 1.0, 0.0, 0.0
  GL.TexCoord 0.0, 1.0; GL.Vertex -SIZE_X, 0.0,  0.0
  GL.TexCoord 1.0, 1.0; GL.Vertex -SIZE_X, 0.0, -SIZE_Z
  GL.TexCoord 1.0, 0.0; GL.Vertex -SIZE_X, 5.0, -SIZE_Z
  GL.TexCoord 0.0, 0.0; GL.Vertex -SIZE_X, 5.0,  0.0
  GL.Normal -1.0, 0.0, 0.0
  GL.TexCoord 0.0, 1.0; GL.Vertex  SIZE_X, 0.0,  0.0
  GL.TexCoord 1.0, 1.0; GL.Vertex  SIZE_X, 0.0, -SIZE_Z
  GL.TexCoord 1.0, 0.0; GL.Vertex  SIZE_X, 5.0, -SIZE_Z
  GL.TexCoord 0.0, 0.0; GL.Vertex  SIZE_X, 5.0,  0.0
  GL.End
  GL.Disable GL::TEXTURE_2D
  GL.EndList
  GL.NewList $list + 1, GL::COMPILE
  GL.Material GL::FRONT, GL::AMBIENT, [ 0.7, 0.7, 0.0, 1.0 ]
  GL.Material GL::FRONT, GL::DIFFUSE, [ 0.3, 0.3, 0.0, 1.0 ]
  GLUT.SolidSphere RADIUS, 16, 16
  GL.EndList
end
display = proc do
  GL.Clear GL::COLOR_BUFFER_BIT | GL::DEPTH_BUFFER_BIT
  GL.CallList $list
  GL.PushMatrix
  GL.Translate *$pos
  GL.CallList $list + 1
  GL.PopMatrix
  GLUT.SwapBuffers
end
reshape = proc do |w, h|
  GL.Viewport 0, 0, w, h
  GL.MatrixMode GL::PROJECTION
  GL.LoadIdentity
  GLU.Perspective 25.0, w.to_f/h, 1.0, 25.0
  GL.MatrixMode GL::MODELVIEW
  GL.LoadIdentity
  GL.Translate 0.0, OBSERVER_Y, OBSERVER_Z
end
keyboard = proc do |key, x, y|
  case key
  when ?\e
    exit 0
  when ?s
    $pos = [ X0, H0, Z0 ]
    $v = [ 0.0, SERVE_SPEED, 0.0 ]
  when ?\
    vz = V_MAX / 2
    t = ( SIZE_Z + $pos[2] + DIST_Z / REFLECTION ) / vz
    vy = 0.5 * GRAVITY * t - $pos[1] / t
    vx = -2 * $pos[0] / t
    $v = [ vx, vy, -vz ]
    #vz = 12.0
    #t = ( DIST_Z + DIST_Z / REFLECTION ) / vz
    #vy = 0.5 * GRAVITY * t - H0 / t
    #vx = -2 * X0 / t
    #$v = [ vx, vy, -vz ]
    #$pos = [ X0, H0, Z0 ]
    $sounds.push( ( $racket * [ 0.2, 0.2 ].min ).to_sint )
  end
end
animate = proc do
  dt = Time.new.to_f - $t
  $t += dt
  g = $pos[1] > RADIUS ? GRAVITY : 0
  $pos[0] += $v[0] * dt
  $pos[1] += $v[1] * dt - 0.5 * g * dt ** 2
  $pos[2] += $v[2] * dt
  v = Math.sqrt $v.inject( 0.0 ) { |a,b| a + b ** 2 }
  if g > 0 or v > MIN_SPEED
    f = g > 0 ? AIR_FRICTION : ROLL_FRICTION
    r = f * v
    $v[0] -= $v[0] * r * dt
    $v[1] -= $v[1] * r * dt + g * dt
    $v[2] -= $v[2] * r * dt
  else
    $v = [ 0, 0, 0 ]
  end
  if $pos[0] < -SIZE_X + RADIUS
    $pos[0] = 2 * ( -SIZE_X + RADIUS ) - $pos[0]
    $v[0] = -$v[0] * REFLECTION
    $sounds.push( ( $wall * [ $v[0].abs / SPEED_PER_VOLUME, 1.0 ].min ).to_sint )
  end
  if $pos[0] > SIZE_X - RADIUS
    $pos[0] = 2 * ( SIZE_X - RADIUS ) - $pos[0]
    $v[0] = -$v[0] * REFLECTION
    $sounds.push( ( $wall * [ $v[0].abs / SPEED_PER_VOLUME, 1.0 ].min ).to_sint )
  end
  if $pos[1] < RADIUS
    if $v[1] < -MIN_SPEED
      $pos[1] = 2 * RADIUS - $pos[1]
      $v[1] = -$v[1] * REFLECTION
      $sounds.push( ( $ground * [ 0.3 * $v[1].abs / SPEED_PER_VOLUME, 0.3 ].min ).to_sint )
    else
      $pos[1] = RADIUS
      $v[1] = 0
    end
  end
  b = $pos[1] > BAR_HEIGHT ? -SIZE_Z + RADIUS : -SIZE_Z + RADIUS + BAR_THICKNESS
  if $pos[2] < b and $v[2] < 0
    $pos[2] = 2 * b - $pos[2]
    $v[2] = -$v[2] * REFLECTION
    $sounds.push( ( $wall * [ $v[2].abs / SPEED_PER_VOLUME, 1.0 ].min ).to_sint )
  end
  if $pos[2] > -RADIUS
    $pos = [ X0, RADIUS, Z0 ]
    $v = [ 0, 0, 0 ]
  end
  if wiimote
    wiimote.get_state
    exit 0 if wiimote.buttons == WiiMote::BTN_HOME
    if wiimote.buttons == WiiMote::BTN_B
      $pos = [ X0, H0, Z0 ]
      $v = [ 0.0, SERVE_SPEED, 0.0 ]
    end
    acc = wiimote.acc.collect { |x| ( x - 120.0 ) / 2.5 }
    if acc[2].abs >= ACC_RISING and Time.new.to_f >= $delay
      $sign = acc[2] > 0 ? +1 : -1 unless $sign
      $strength = [ acc[2].abs, $strength ].max
    elsif $sign
      if acc[2] * $sign <= ACC_FALLING
        if $pos[1] >= MIN_HEIGHT
          # a = Math::PI + 2 * Math.atan2( $v[0], $v[2] ) - Math.atan( ( $pos[2] - NORM_Z ) / L )
          $sounds.push( ( $racket * [ $strength * 0.3 / 50, 0.3 ].min ).to_sint )
          vz = V_MIN + ( V_MAX - V_MIN ) * $strength / 50
          # vz = 12.5
          t = ( SIZE_Z + $pos[2] + DIST_Z / REFLECTION ) / vz
          vy = 0.5 * GRAVITY * t - $pos[1] / t
          vx = -2 * $pos[0] / t
          # vx = Math.tan( a ) * vz
          $v = [ vx, vy, -vz ]
        end
        $sign = nil
        $strength = 0.0
        $delay = Time.new.to_f + MIN_DELAY
      end
    end
  end
  avail = $alsa.avail
  $alsa.write( $sounds.inject( MultiArray.sint( 2, avail ).fill!( 0 ) ) do |x,s|
    n = [ x.shape[1], s.shape[1] ].min
    x[ 0 ... 2, 0 ... n ] + s[ 0 ... 2, 0 ... n ]
  end )
  $sounds = $sounds.select { |s| s.shape[1] > avail }.collect do |s|
    s[ 0 ... 2, avail ... s.shape[1] ]
  end
  GLUT.PostRedisplay
end
GLUT.Init
GLUT.InitDisplayMode GLUT_DOUBLE | GLUT_RGB | GLUT_DEPTH
GLUT.InitWindowSize WIDTH, HEIGHT
GLUT.CreateWindow 'Wii Remote'
init
GLUT.DisplayFunc display
GLUT.ReshapeFunc reshape
GLUT.KeyboardFunc keyboard
GLUT.IdleFunc animate
GLUT.MainLoop
See also:
Time Tracking
27 Jan 2011I recently read an interesting article about time tracking by Sebastian Marshall. There are also two videos about time tracking by the same author. To quote from the website:
To put it simply – I now realize it’s impossible to understand how your life is going without some careful observation. There’s a lot of time each day, and knowing where that time goes, what you ate, what you did and didn’t do… it’s almost impossible to get a good picture of your life without some kind of measuring.
I realised that one could develop a small time tracker in Ruby quite easily. The tracker shown below will ask you questions after showing you the answers of the previous 7 days. In the morning it asks questions of your plans and in the evening it asks you questions in review. You can also run the script multiple times and skip through the questions where you don’t want to modify the answer. I have tried to keep it simple. Quoting from another article by Sebastian Marshall:
Second, remember to start simple. This is to build up momentum and make a workable system you actually use. Do it every day. If you miss a day or two or three, fill in from memory as best as you can. If you fell off a cliff for a while, just reboot. Don’t beat yourself up too much – it solves nothing. We all fall off a cliff sometimes. Also, remember the gains made from living more purposefully are forever – the time you’ve spent well will remains well-spent even if you fall off for a while sometimes. Most people don’t even try, which is why most people don’t succeed.
#!/usr/bin/env ruby
require 'readline'
require 'fileutils'
require 'rexml/document'
include REXML
def track( log, previous, tag, query )
  previous.each_with_index do |prev,i|
    if prev
      if prev.elements[ tag ]
        puts "#{previous.size-i} day(s) ago: #{prev.elements[ tag ].text}"
      end
    end
  end
  item = log.elements[ tag ]
  item = log.add_element tag unless item
  if item.text
    line = "-> #{query} (#{item.text})? "
  else
    line = "-> #{query}? "
  end
  # print line; STDOUT.flush
  # text = STDIN.readline.gsub /[ \r\n]*$/, ''
  text = Readline.readline line
  item.text = text unless text.empty?
end
if File.exist? 'track.xml'
  doc = File.open( 'track.xml', 'r' ) { |f| Document.new f }
else
  doc = Document.new
  doc.add_element 'track'
end
time = Time.new
t = "%4d/%2d/%2d" % [ time.year, time.month, time.day ]
log = doc.root.elements[ "log[@date='#{t}']" ]
previous = ( 1 .. 7 ).collect do |i|
  timep = time - 86400 * i
  tp = "%4d/%2d/%2d" % [ timep.year, timep.month, timep.day ]
  doc.root.elements[ "log[@date='#{tp}']" ]
end.reverse
unless log
  log = Element.new 'log'
  log.add_attribute 'date', t
  doc.root.add_element log
end
list = []
list +=
  [ [ 'wakeup'     , 'At what time did you get up' ],
    [ 'sleep'      , 'How long did you sleep' ],
    [ 'wellness'   , 'Do you feel well' ],
    [ 'objective'  , 'What\'s the objective for today' ] ]
if time.hour >= 14
  list +=
    [ [ 'description', 'What did you do today' ],
      [ 'food', 'What did you eat' ],
      [ 'positive', 'What did I do right to move me towards my goals' ],
      [ 'toimprove', 'What would I do differently if I had the day to live over' ] ]
end
list.each { |tag,query| track log, previous, tag, query }
File.open 'track.xml.part', 'w' do |f|
  doc.write f
end
FileUtils.mv 'track.xml.part', 'track.xml'
I will try to play with this for some time and see whether it has any benefits.
See also: